
Homelab Wildcard Cert with Cloudflare and Zoraxy
Posted on 2025-02-12After the successful setup of my new cheap low-power Proxmox server, I had multiple web applications listening on a diversity of combinations of IP addresses and high ports (e.g. https://192.168.1.100:8000). Furthermore I had the issue that I needed to add security exceptions to my browsers so that they would access these apps despite their self-signed certificates.
I have therefore decided to set up an internal reverse proxy, which is configured with a wildcard SSL/TLS certificate for my internal domain. Subsequently, all applications should receive a subdomain and then be accessible via this in the internal network via the reverse proxy.
As I had not yet defined an internal domain in my network, I first had to buy one. The choice fell on rz01.org. I describe why in this post.
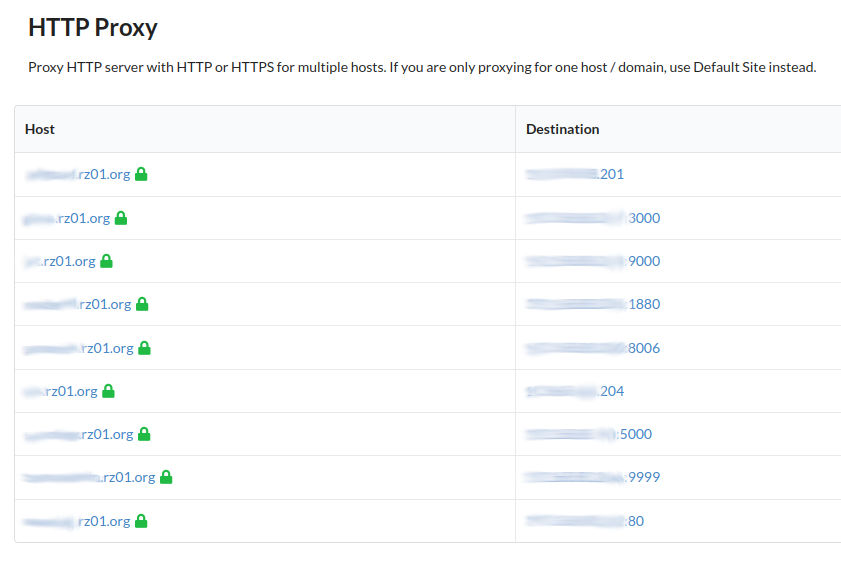
Then, out of sheer laziness, I decided to use Zoraxy as a reverse proxy, as there is a Proxmox Community Script available for this. After Zoraxy was installed, I first created the proxy rules for my applications:
The challenge with the internal use of external domains and issuing a wildcard certificate for them is that an HTTP challenge is not possible. Fortunately, Let’s Encrypt also offers the option of a DNS challenge. The DNS provider must offer an API via which Let’s Encrypt’s ACME client can then access the DNS entries. I actually host all my domains on the DNS side with Namecheap, but Namecheap has the unfortunate limitation with their API that you have to whitelist source IPs. Since I don’t have a static IP at home, I couldn’t carry out my project with Namecheap. That’s why I decided to use Cloudflare as my DNS provider.
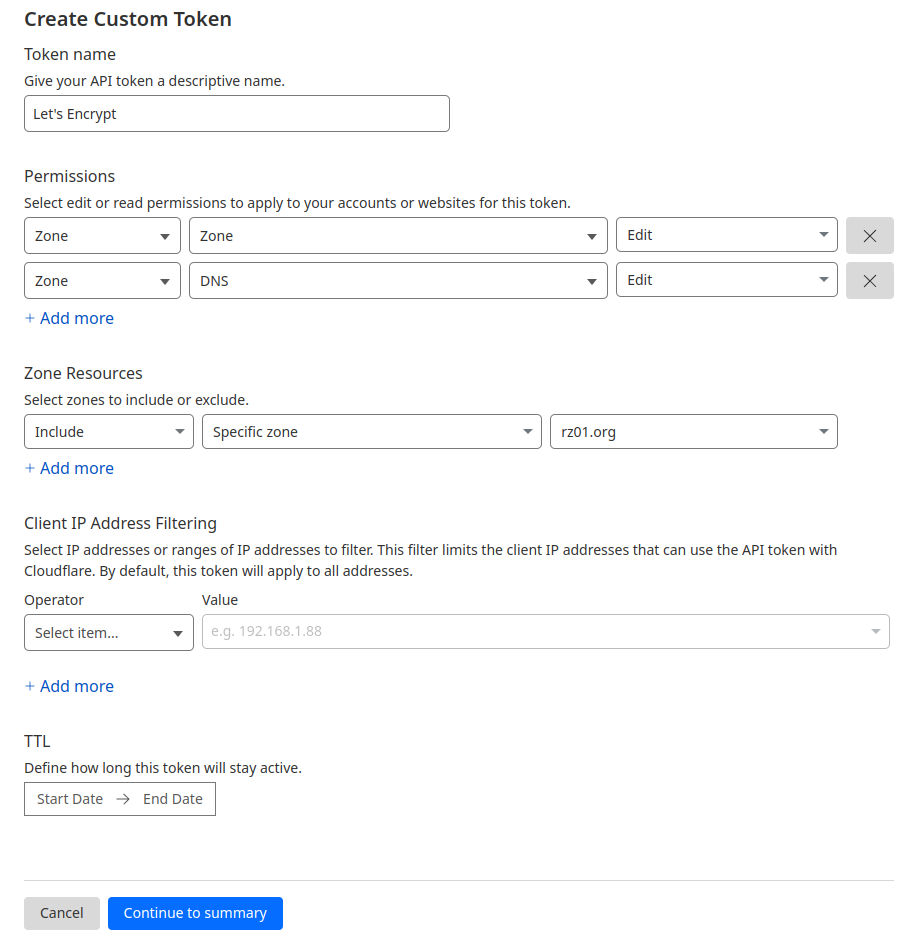
After I set up the domain rz01.org at Cloudflare, I first had to create an API token for Let’s Encrypt. To do this, click on the user icon at the top right of the Cloudflare dashboard, then on “Profile” and then on “API Tokens”. To create the token, click on “Create Token” and then at the bottom on “Create Custom Token” as we only want to allow access to a few areas via this token. I have configured the API token for my domain as follows:
Now that we have an API token, we log in to the Zoraxy admin UI, click on “TLS / SSL Certificates” in the sidebar on the left and then on “Open ACME Tools” at the bottom.
In the sidebar that then opens on the right, first enter a valid email address under “ACME Email” and click on “Open ACME Tools”. Now enter the domain (in my case rz01.org) under “Generate new certificate” and select “Let’s Encrypt” as the CA. After clicking on “Use a DNS Challenge”, select “Cloudflare” as the DNS provider and enter the Cloudflare API. Then click on “Get Certificate”.
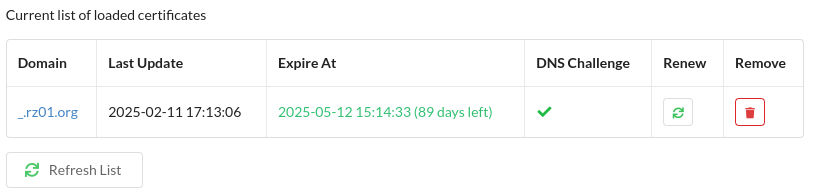
If everything went well, the result in Zoraxy looks like this:
Then, of course, the (sub)domains listed above must be defined in the local DNS server. The whole thing should then look something like this (192.168.1.222 is the IP address of Zoraxy in this case):
192.168.1.222 app1.rz01.org app2.rz01.org app3.rz01.org app4.rz01.org
If you now call up https://app1.rz01.org from inside the internal network, the local DNS server will resolve this domain so that you are referred to Zoraxy which then terminates the SSL/TLS connection with a valid certificate and returns the content of app1.