Building the EAntenna Dual Band Moxon for 10m/6m
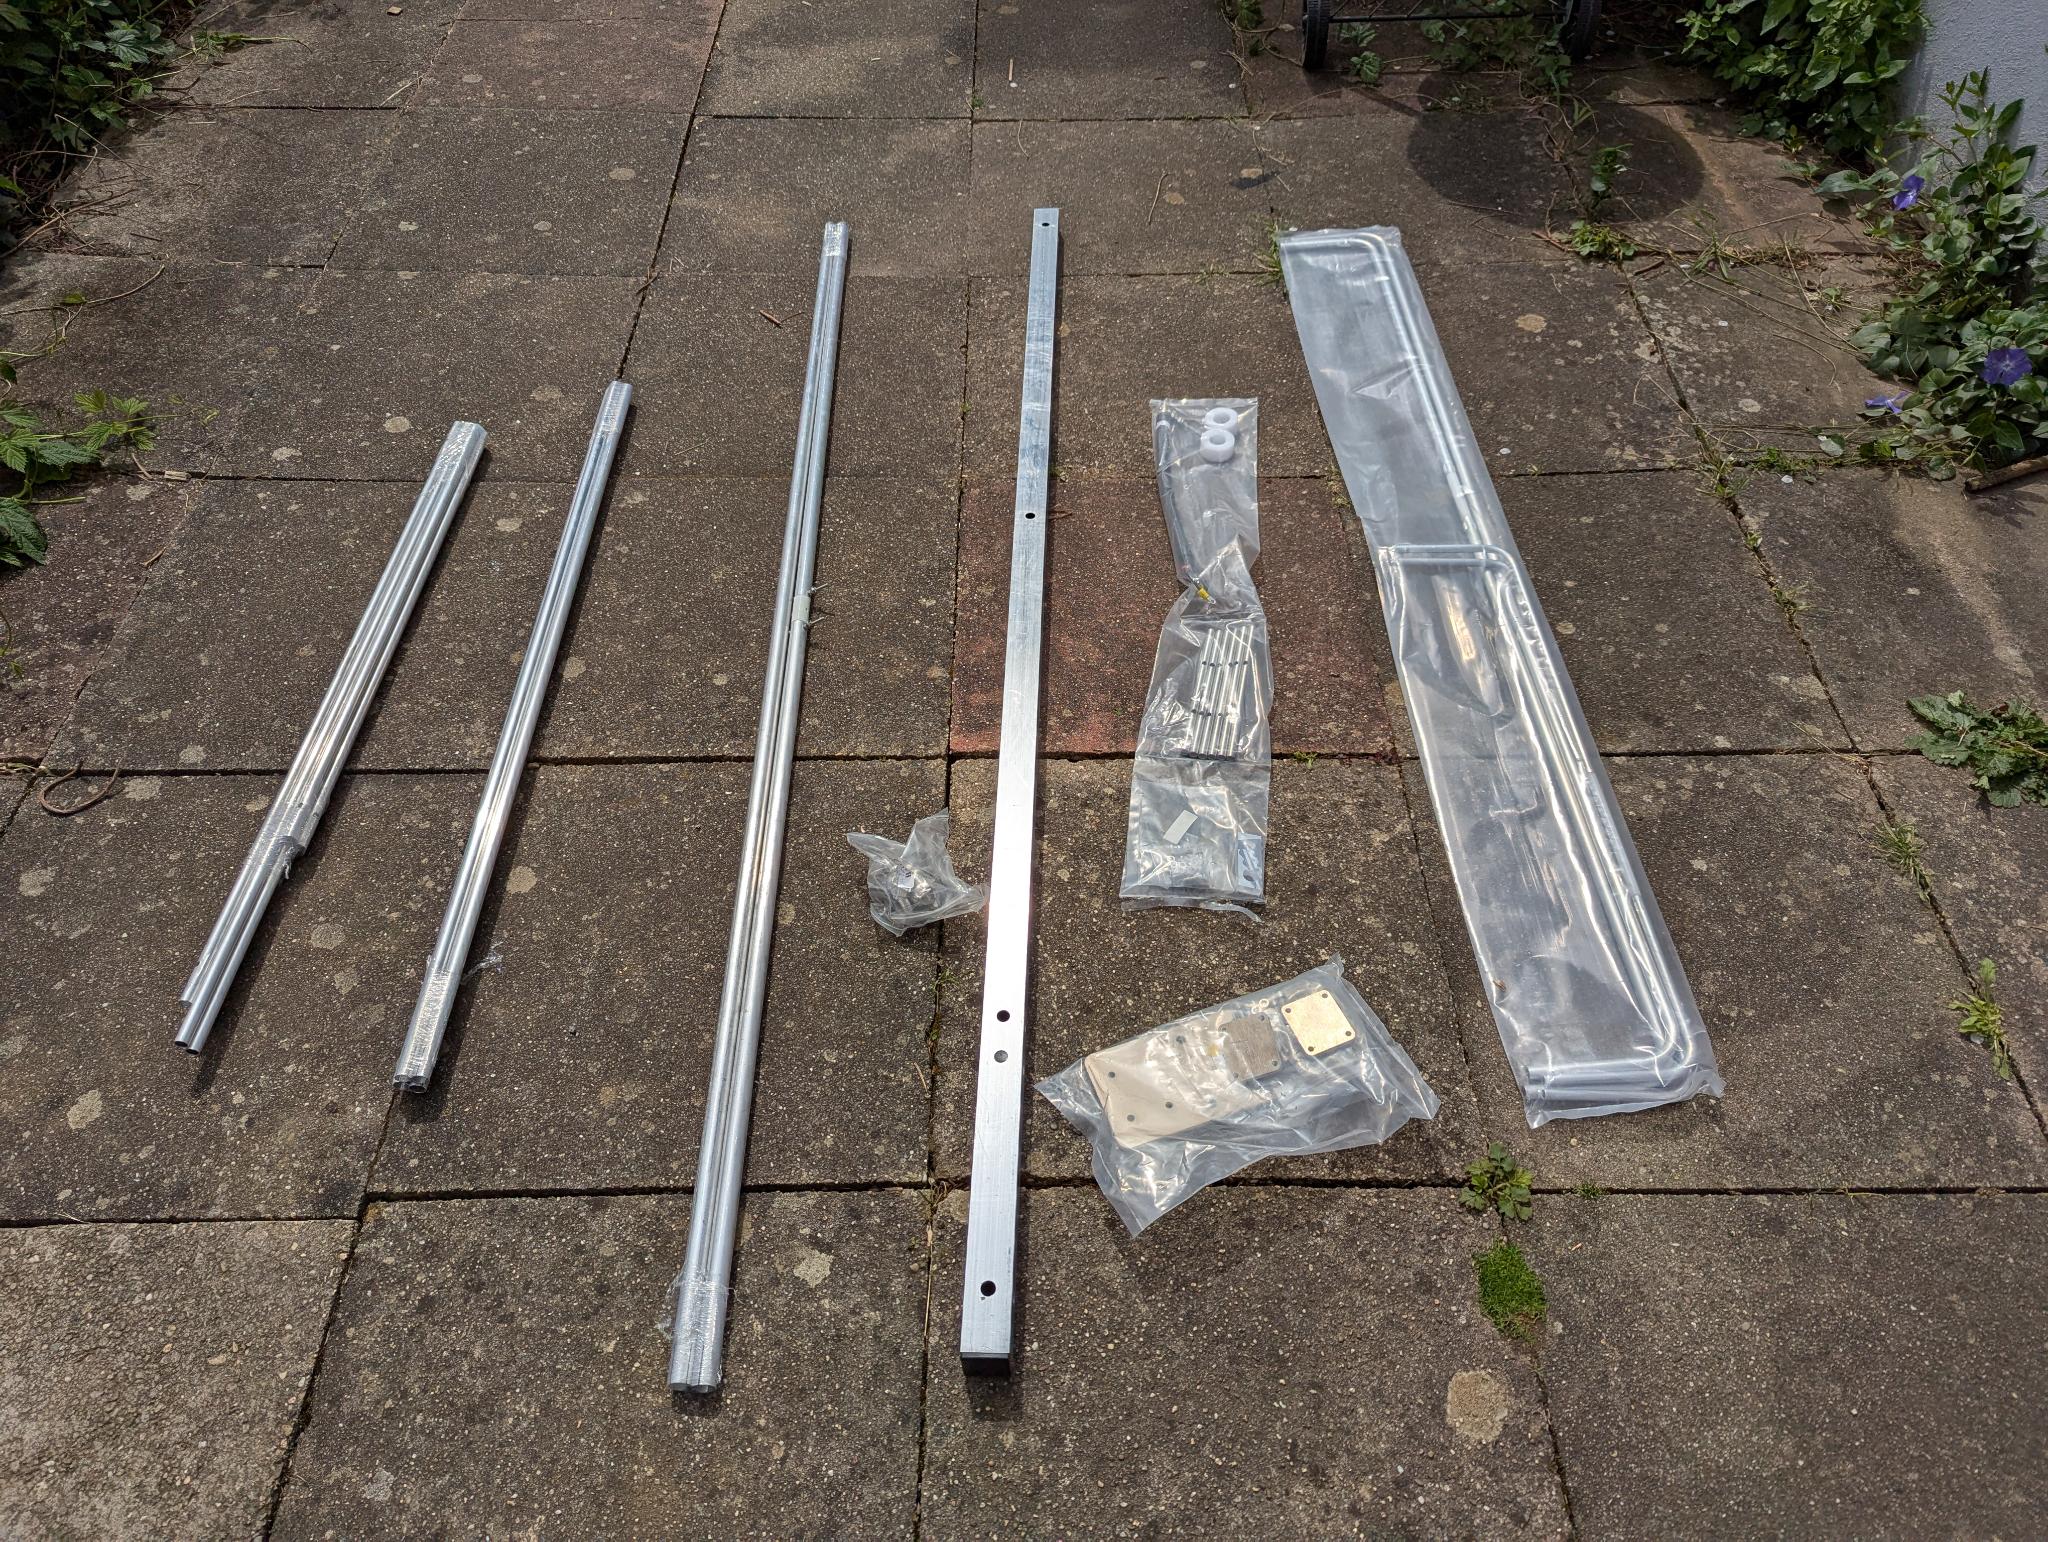
Posted on 2025-04-24 by DK1MIMy main HF antenna, a 13m long vertical paired with a CG-3000 automatic antenna tuner, does a decent job on 160m to 12m but it really isn’t doing great on 10. In fact, all my previous antennas weren’t great on 10m. This is why I decided to buy a Dual Band Moxon Antenna 10m/6m from EAntenna (which has been bought by WiMo). This is what the kit looks like after unboxing the single, quite small package:
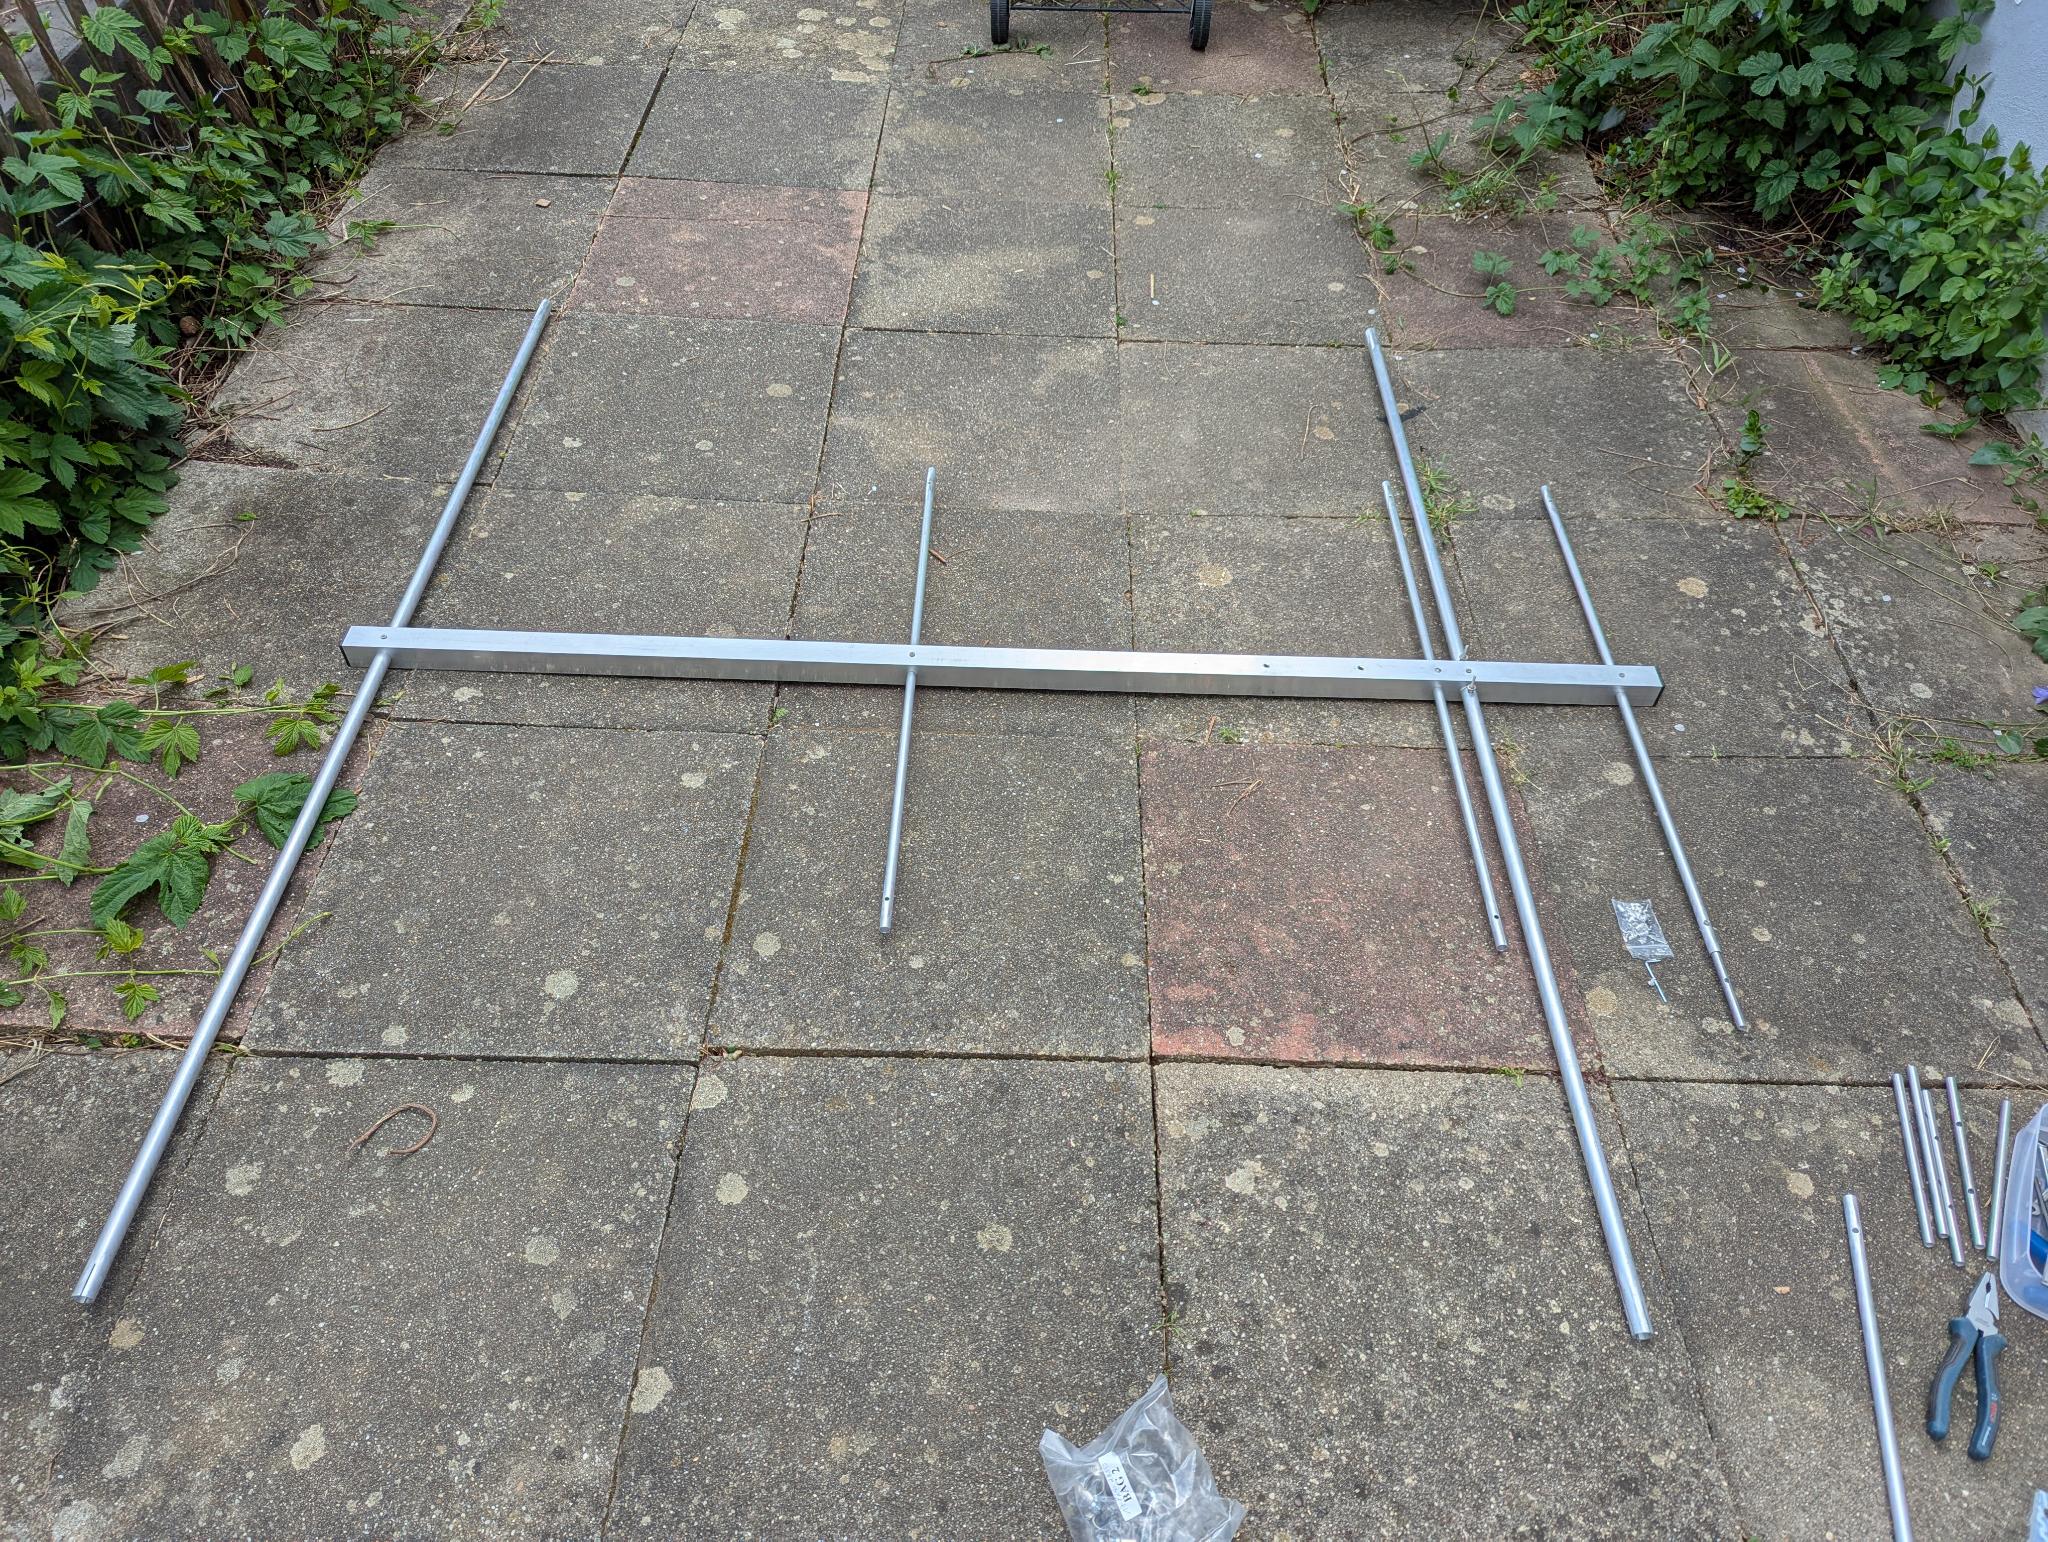
I started with reading the printed manual. Afterwards, I was more confused than before. I had to read it multiple times, look at (the very few) images of this antenna on the internet and still wasn’t prepared for the build - but started anyway. So I began with the 10m parts - which are (in the first step) the two 20mm tubes that have a small hole in the middle. The reflector is inserted at the end of the boom (most left one on the following image), the driven element into the remaining 20mm hole. The driven element has an insulator in the middle which needs to be disassembled on one side before sliding it into the boom. Afterwards, it needs to be screwed back to the temporarily removed half of the tube. Both 20mm tubes need to be mounted to the boom with each one of the five available M4 screws and nuts. The nut goes into the bigger hole of the boom, the screw into the smaller one. The same needs to be done for the three equally long 13mm tubes for the 6m band. These tubes don’t have slots at the end but holes with each two different sizes instead.
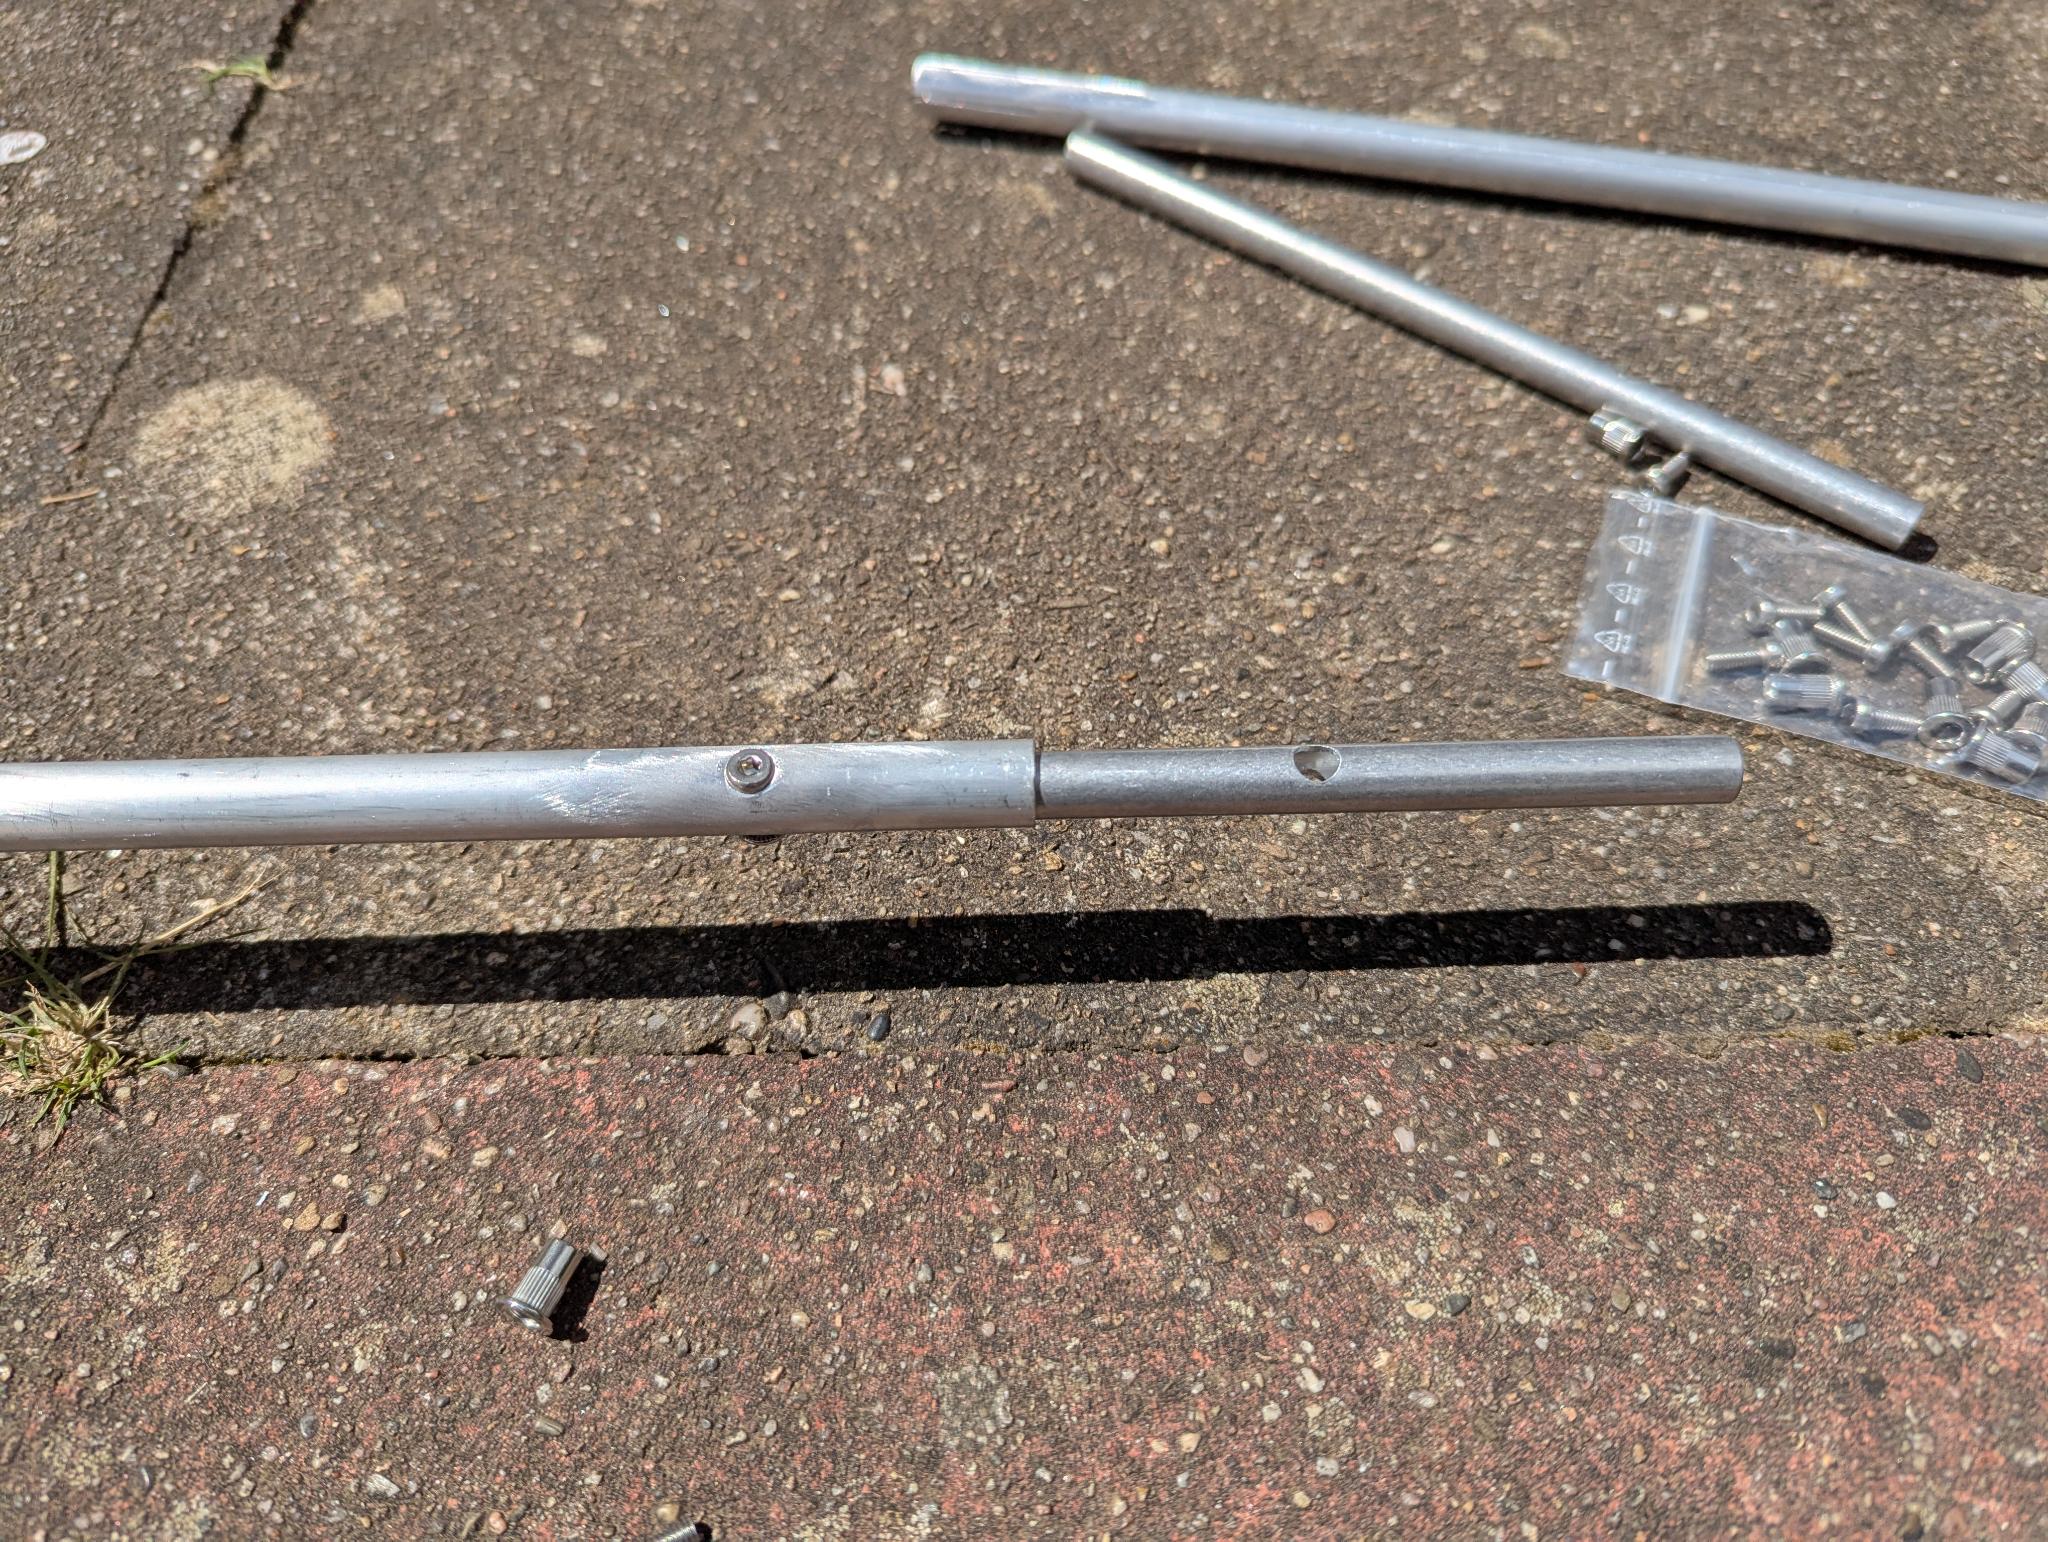
All three 13mm tubes for the 6m band need to be extended. For this, the six short tubes of same same length with holes at each end are inserted into the tubes and fixed with a combination of a screw and a threaded insert (bottom left on the floor in the next image). The threaded insert belongs into the smaller hole, the screw into the bigger. This way the screw head slips though the hole of the outer tube and sits tight on the inner tube.
Now comes the tricky part. There are four 13mm tubes of the same length with holes on the one side and slots on the other. They need to be slid over the previously inserted short inner tubes and mounted with the remaining screw/threaded insert combos. This time it was very tricky as the holes need to be aligned and are not very cleanly drilled. Those four extension tubes need to be mounted to the two inner 6m elements. There are two remaining 13mm tubes that are longer than the previous four and need to be mounted to the 6m director (most left tube on the next image).
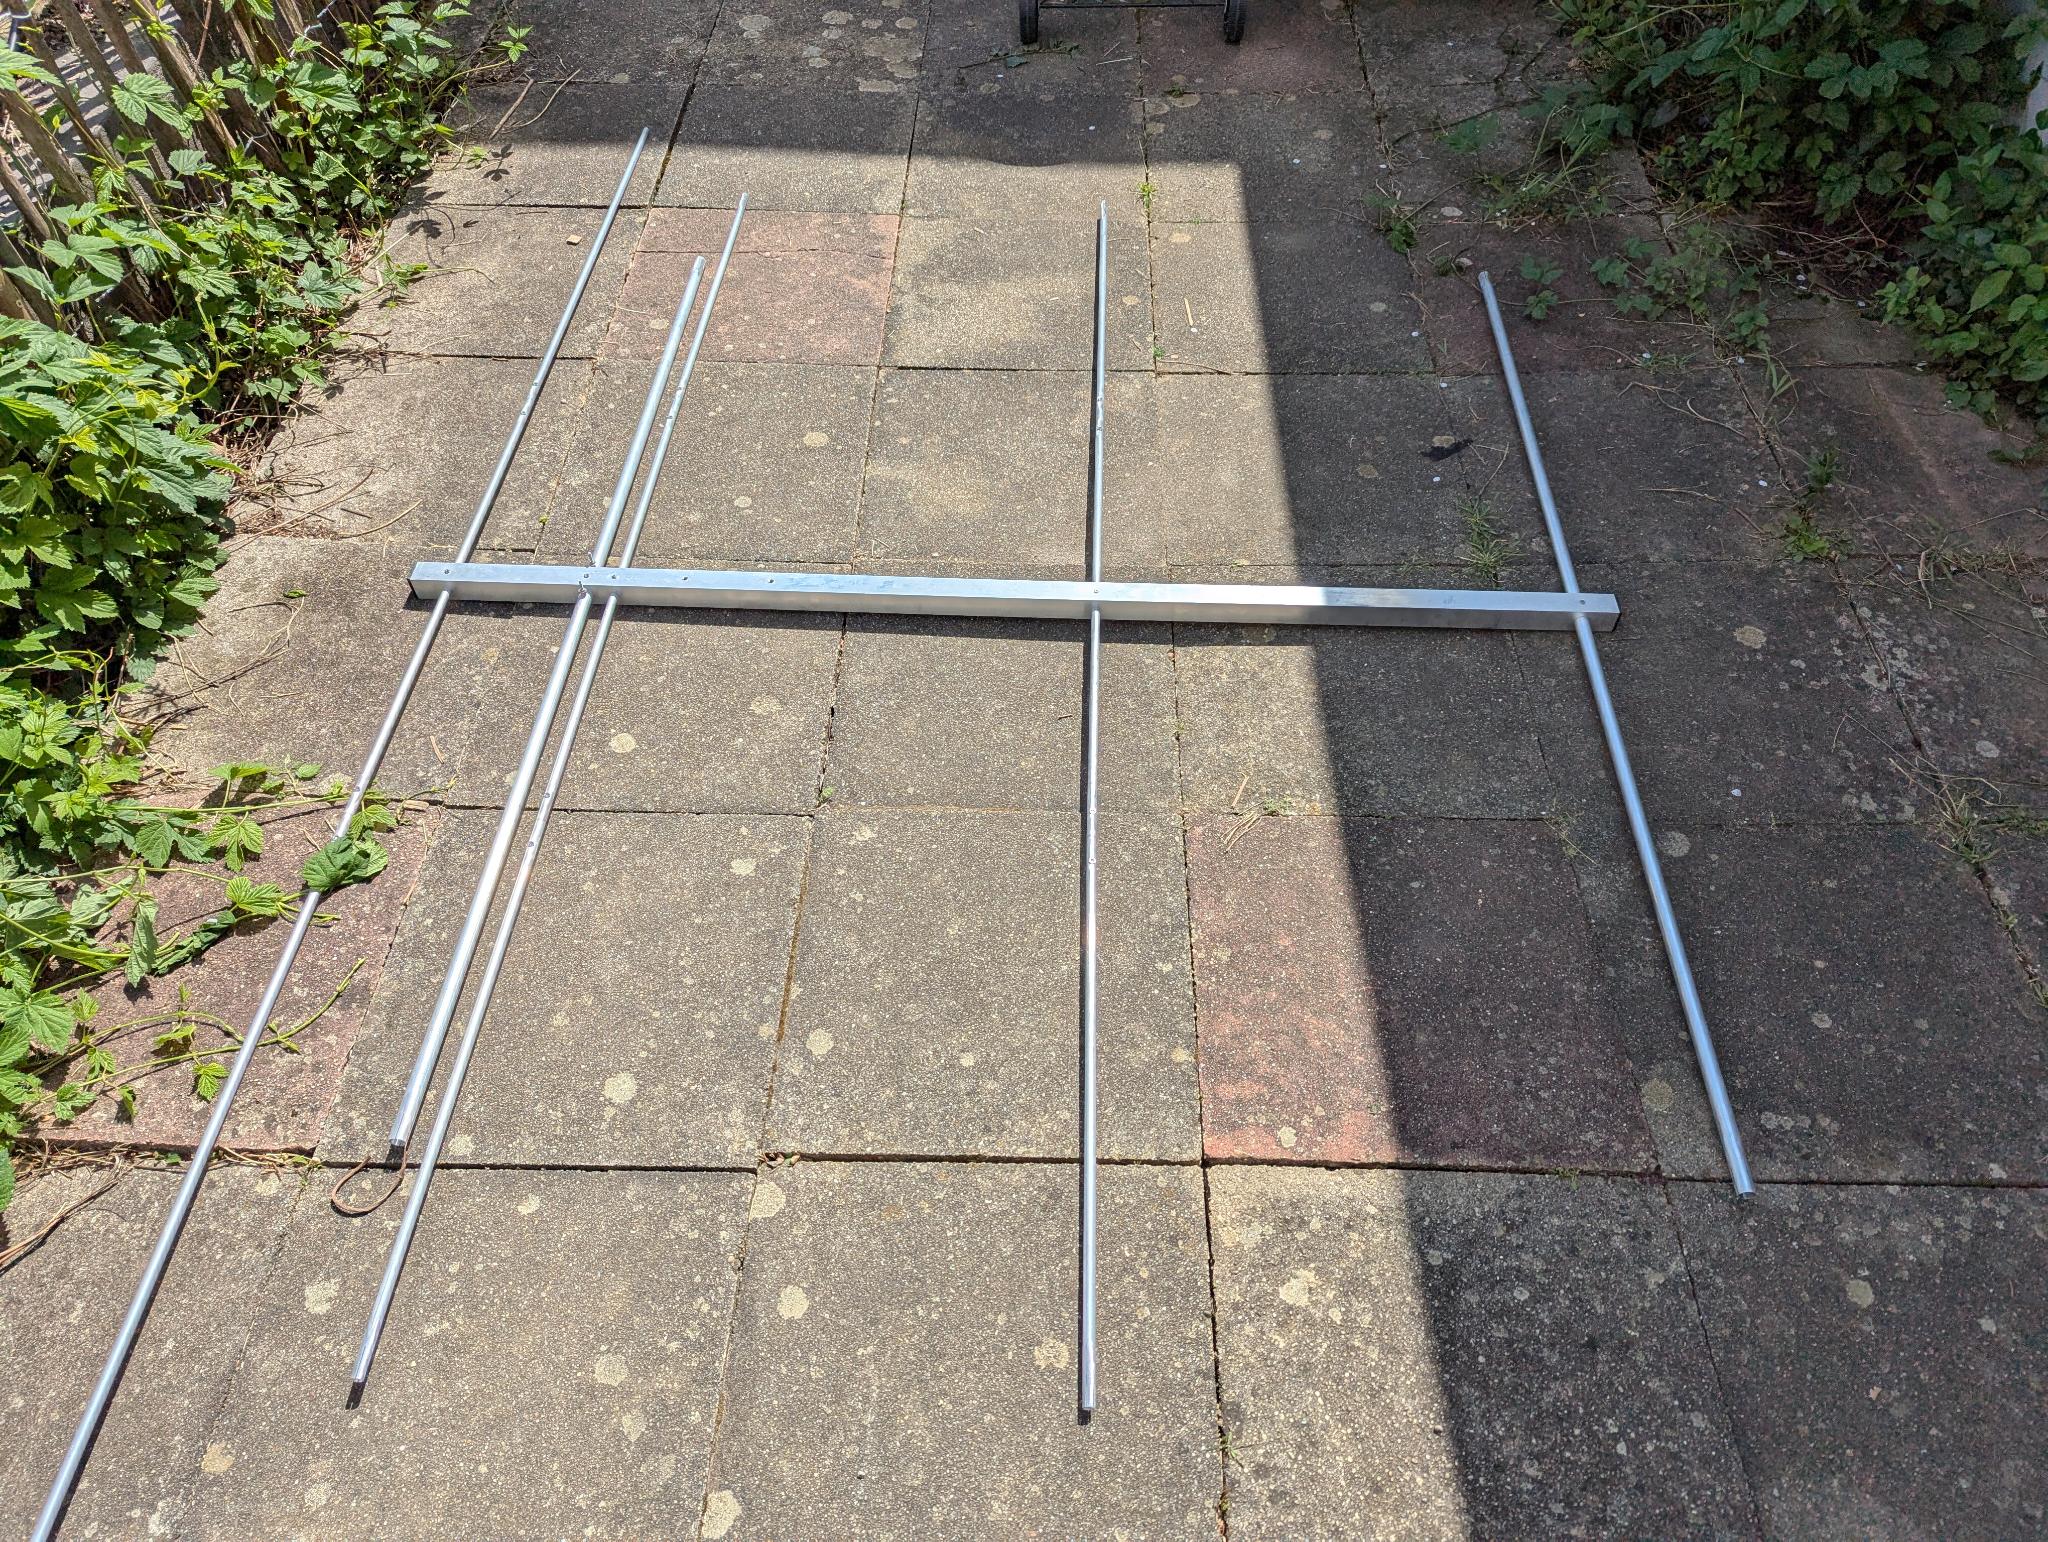
After this not so great experience, I’ve extended the two 10m elements with four 16mm tubes which all have the same length. These need to be inserted 15cm into the 20mm tube and clamped with a hose clamp. The manual suggests that there are three different sizes but only found two different sizes in my package - which was not a problem. In this case, the bigger ones were needed, all other tubes can be clamped with the smaller ones.
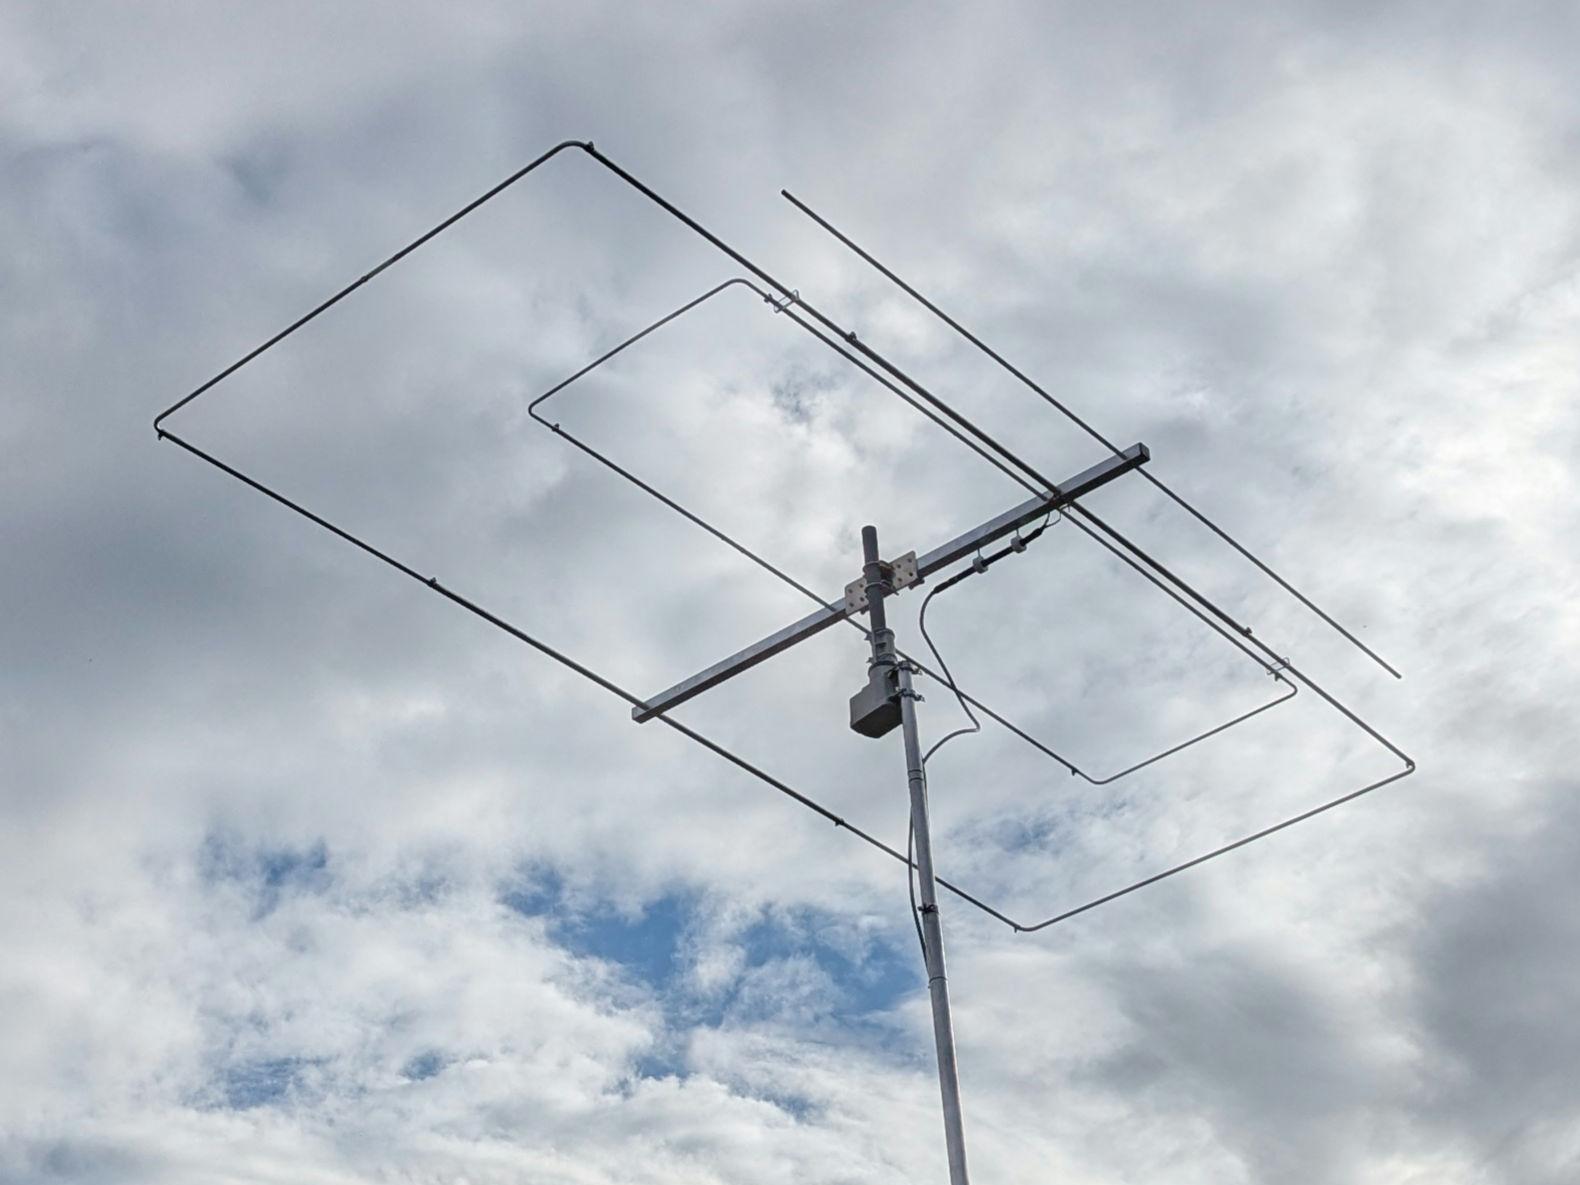
It was now the perfect time to already slide the acrylic isolator parts on both driven elements. Afterwards, the four pre-bent tubes were mounted according to the manual which was actually usable in this case. The isolator parts need to closer to the driven elements, “pointing” to the front of the antenna.
Afterwards, I fastened the two acrylic isolators (see next image for their position), installed the mast mount and the balun. While the mast mount installation is pretty intuitive, it took me some time to understand how to mount the balun. The trick is to screw in the two holders (with the plastic rings) a bit further into the boom than necessary while keeping both nuts in the middle of the threaded rods. Then the balun is inserted and the threaded rods are screwed back counter-clockwise so they will go back up until they secure the balun inside the plastic rings. When this is done, the nuts need to be used to secure the rod to the boom and the plastic ring.
There were two things that annoyed me during this build: The really bad manual and the fiddly and frustrating part with the inner tubes and the threaded insert. Apart from that, the antenna feels stable and looks professional. There was no tuning necessary, I had a very low SWR on both bands right away. I only had a few QSOs so far which proved that the antenna works. Time will tell if it only works or if it works well.